
The Grow Room is ROB RUN's weed farm. You build it on your own plot, put Grow Tables inside and set Growing Bushes on them. A mature bush gives Harvest Bags that you sell to a Fence, and then it grows again by itself. Equipment is cheap next to what it earns; the hard part is finding bushes.
What you need
- Your own plot with a house (Land Plot Title + Trailer, $160,000). See bases and plots.
- Grow Room: $150,000 to research, then $100,000.
- Grow Table: $30,000 to research, then $40,000 each, up to 6.
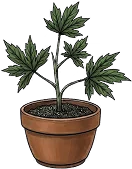
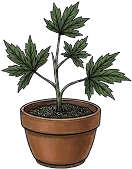
- Growing Bushes: uncommon, epic or legendary. They are not sold anywhere.
Starter cost: $320,000 for the room and one table. All 6 tables bring it to $520,000. Research is in Lenny's Tree under Production, and everything is bought on the Trade Laptop. The room, the table and the Fan need no district tier; the Water Pump needs a tier II plot and the UV Lamp tier III.
How growing works
- Place the Grow Room on your plot and put Grow Tables in its places.
- Carry a Growing Bush in and put it on a table. Bushes are cargo, so they go in your hands, not your bag.
- Wait. The table works in 36-second ticks, and the clock icon over the bush turns into a check mark when it's mature.
- Harvest it. It takes about 5 seconds and gives 2 to 4 Harvest Bags of the bush's rarity.
- The bush turns back into a Growing Bush of the same rarity and starts again. You never replant.
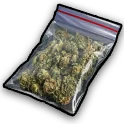
A bush keeps producing until the wipe, so every bush you bring home pays again and again. That is why bushes, not equipment, limit how much a Grow Room makes: buy tables only as fast as you find bushes to put on them.
What a harvest pays
| Rarity | Bag (Fence) | Per harvest | Bush: growing / mature |
|---|---|---|---|
| Uncommon | $4,000 | $8,000–16,000 | $20,000 / $30,000 |
| Epic | $6,000 | $12,000–24,000 | $30,000 / $45,000 |
| Legendary | $8,000 | $16,000–32,000 | $40,000 / $60,000 |
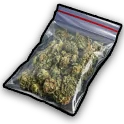
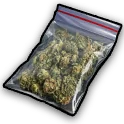
"Per harvest" is 2 to 4 bags. The Smuggler also buys bushes themselves, growing or mature, but then the bush is gone. A full room of 36 bushes gives 72 to 144 bags per round of harvests: $288,000 to $576,000 with uncommon bushes and up to $1,152,000 with legendaries, before Notoriety. Harvest Bags sell to a Fence, so they get up to +50% at Notoriety 5.
Harvest it or sell the bush?
Harvest. The Smuggler buys bushes too, but selling one ends it. Harvesting pays you the bags and leaves you the bush, which you can still sell later. The only time selling wins is just before the wipe: if the next harvest won't be ready in time, sell your bushes to the Smuggler rather than lose them.
Upgrades
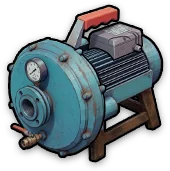
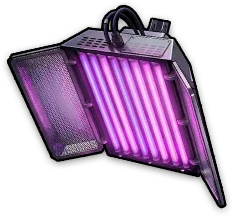
Each Grow Table takes three upgrades, one of each, and all three can be on the same table. They unlock in a chain in Lenny's Tree: Grow Table, then Fan, then Water Pump, then UV Lamp.
| Upgrade | Growth speed | Research | Price | Plot tier | For 6 tables |
|---|---|---|---|---|---|
| Fan | +12% | $100,000 | $25,000 | I | $250,000 |
| Water Pump | +14% | $200,000 | $70,000 | II | $620,000 |
| UV Lamp | +24% | $500,000 | $250,000 | III | $2,000,000 |

"For 6 tables" counts the research once. A full room with every upgrade costs $3,390,000 in total. Moving your plot to a higher district takes the Grow Room and everything in it with you, so nothing is lost when you move up for the Pump or Lamp.
Where to build: the Reservoir
A Reservoir map building gives every settlement next to it a 50% chance of an extra harvest. There are two, in Rivertown and Highlands. Good grow plots:
| Settlement | Plot tier | Also next to | Why |
|---|---|---|---|
| Highlands #29 | III | Black Market, Arms Factory | UV Lamps allowed; the top pick |
| Highlands #40 | III | Bunker | UV Lamps and +3 defense |
| Rivertown #27 or #32 | II | Bunker | The cheapest serious grow base |
Settlement numbers and the other map buildings are on where to settle.
Protecting it
A full Grow Room is one of the best raid targets in a settlement. It has 5 defense and 9 fuse slots. Unfused, 5 uncommon Decoders open it. Nine uncommon Electronic Fuses ($190,000 with research) take it to 14, and legendary fuses up to 50. Hacking your house doesn't open the Grow Room; each building is its own fight. See raids and defense.
Selling and carrying
- Harvest Bags are ordinary items: they stack to 10, ride in your bag, and you can keep your gun out. Sell them to a Fence.
- Bushes are cargo. Drawing a weapon drops them, and a cop can seize them (an uncommon Growing Bush is $5,000 to the cop).
- Keep spare bushes in a security cabinet, not an open rack. Raiders need a Master Key for cabinets.
Grow Room or chemical lab?
| Grow Room | Chemical Laboratory | |
|---|---|---|
| Building | $250,000 with research | $270,000 with research |
| Input | Growing Bushes, reused until the wipe | Reagents, used up every batch |
| Product | Harvest Bags, $4,000–8,000 each (Fence) | Hard Crystals, $30,000–75,000 each (Smuggler) |
| Map bonus | Reservoir: extra harvest chance | Laboratory: 20% faster |
| Defense | 5, with 9 fuse slots | 3, with 6 fuse slots |
| Gives itself away | No | Smoke over the roof while running |
The Grow Room wins on input: one good bush keeps paying all week. The lab pays more per piece but needs a fresh reagent for every batch. If you can afford both, run both. See the chemical lab.
Mistakes to avoid
- Selling mature bushes. You trade every future harvest for one payment.
- Buying all 6 tables on day one. An empty table earns nothing.
- Leaving the room unfused. Raiders check Grow Rooms and labs first.
- Carrying bushes with a gun out. They drop the moment you draw.
Related
Grow RoomGrow TableFanWater PumpUV LampGrowing BushHarvest Bag
From the FAQ
- How does the Grow Room work?
- How much do Harvest Bags sell for?
- What speeds up growing?
- Where do I get reagents and bushes?